Connect to a Windows Remote Server
This article will show you several ways to connect to a Windows remote server.
Before you start connection, you will need to get the connection informaiton first, which can be get in the Control panel.
1. Locate your server in the Control Panel
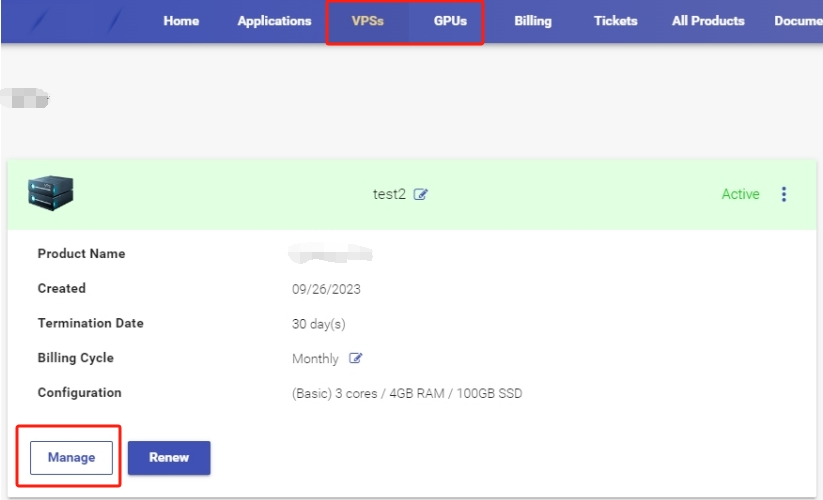
Please log in to the Control Panel with your credentials. Then, locate your target server on these pages.
2. Get connection information
Click the Manage button, followed by the Overview tab in the left navigation bar.
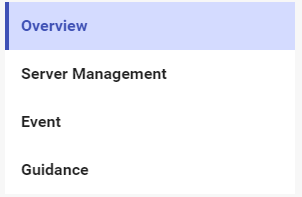
You can get the connection information under the Server Connection Information section.

3. Connect to server
The connection method will vary depending on the operating system of the machine you are initiating the connection from.
From Windows
If you are running a Windows system on your local PC and trying to connect to a remote Windows server, the most convenient way is to use Remote Desktop Protocol (RDP).
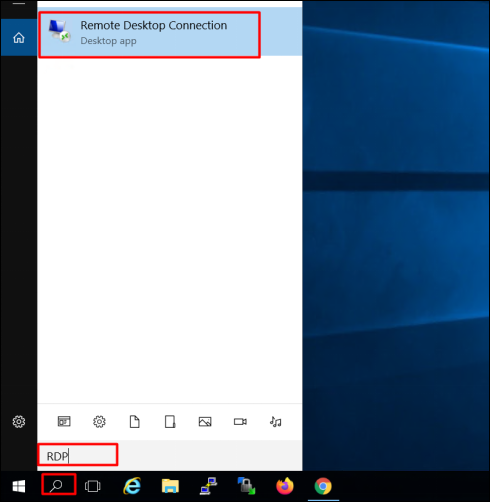
- Open RDP
1) Type RDP in the Search Windows box on the taskbar 2) Click Remote Desktop Connection
- Enter your server IP address with the RDP port in Computer and click Connect
The default port is 3389. If you are using the default port, you only need to input your server IP in the Computer field and click Connect.
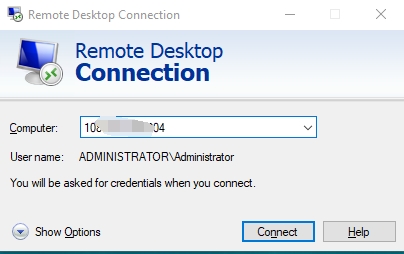
If you are using a custom port, you need to input your server IP, followed by ":port" as the screeshot shows. Then, click Connect.
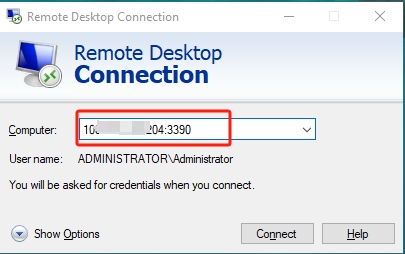
- Input your username and password
Input your login name and password, you should be able to log in to your remote Windows server.
PuTTy
Putty is a free SSH and telnet client for Windows. It provides a text user interface to remote computers running any of its supported protocols.
How to access a Linux GPU Server using PuTTy
From MacOS
If you are runing a MacOS PC, please refer to the Youtube tutorial for connection.
How to Access Windows Server via Mac :tw-1f3ac: YouTuBe Video
From Linux
How to Access Windows Server from Linux :tw-1f3ac: YouTuBe Video